Last updated on June 9th, 2022 at 05:02 am
Microsoft Outlook is a daily-based emailing software for users around the globe. Exchange of emails is common in this application. Sometime, in lieu of having access to multiple accounts to exchange messages between professionals, teams and business associates, communications through one platform makes it easier for users. Because of this, mailboxes for other email accounts such as Office 365, Gmail, IMAP accounts etc. can be set up within an Outlook account to facilitate the exchange of information via emails. This configuration allows access to the specified account mailbox, as well as enabling send/receive actions using the Outlook platform.
The manual configuration process for other email accounts that are available in Outlook is very similar however the primary concern is the configuration of an Office 365 account in Outlook (specifically for Outlook 2019, 2016 and 2013).
Related Page: Trick to Export Emails from Office 365 to Outlook 2019
Notification: Microsoft Outlook versions older than Outlook 2010 does not support the configuration of an Office 365 account within it.
Configure Office 365 Account in Outlook 2013 manually
If you are planning to set up an Office 365 account in Outlook 2013 version, you have follow these steps in a sequence be careful.
1. Make sure that first, you check that the Microsoft Outlook application is not running. If it’s running, shut down or quit the application.
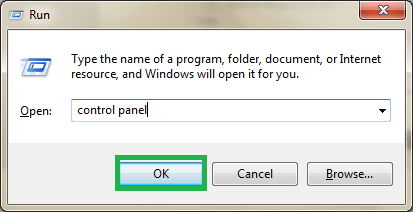
2. Now Click Windows by using the R alphabet and then type Control Panel in the box. Click OK to launch it.
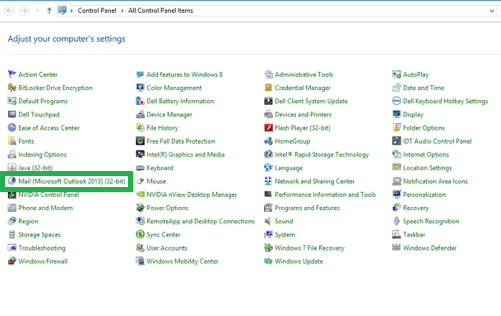
3. Click the Mail option within the Control Panel.
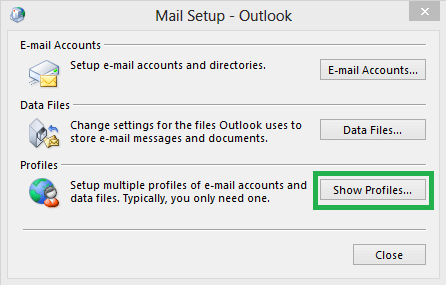
4. The Mail Set-up Page will be open. There, you can click the Show Profiles.
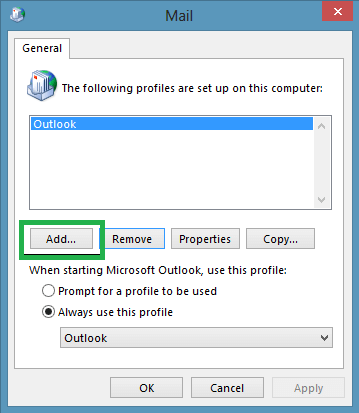
5. On the Mail page Click on the Add option to add a profile to your account.
6. Then, type in the new name for your profile, and click OK.
7. On the Add Account page, select the option manual setup or add additional server types, and then click next.
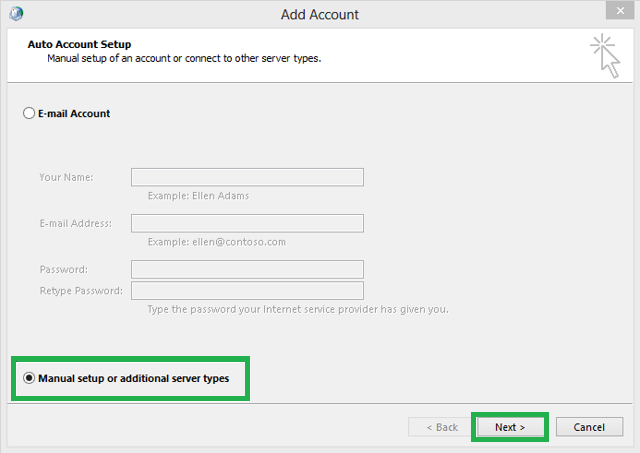
8. Choose from the options Microsoft Exchange Server or compatible service, then click Next.
9. Type outlook.office365.com against the Server option; provide your Office 365 account email address against User name. Check the box if you would like to access your email when Outlook is offline. Select the More Settings.
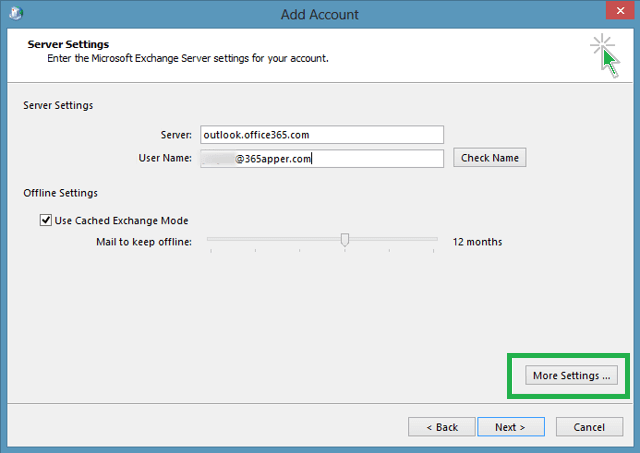
10. Click on the Security tab. Uncheck the option to encrypt information in between Microsoft Outlook and Microsoft Exchange Also, remove the Always prompt for logon credentials. Select the Anonymous Option for Authentication under Logon security.
11. Then, go through your Connection Tab on this page. Select the option for Connecting with Microsoft Exchange using HTTP and then select the Exchange Proxy Settings. In the opened Microsoft Exchange Proxy Settings page, type outlook.office365.com under Use this URL to connect my proxy server for Exchange field. Choose the checkbox for Connect via SSL only. After that, select the checkbox only Connect to Proxy Servers that have this name in their certificates and then type msstd:outlook.com. Select both checkboxes to connect to slow and fast networks. If you are using this authentication when using my proxy to Exchange, choose the Basic Authentication and select”OK”.
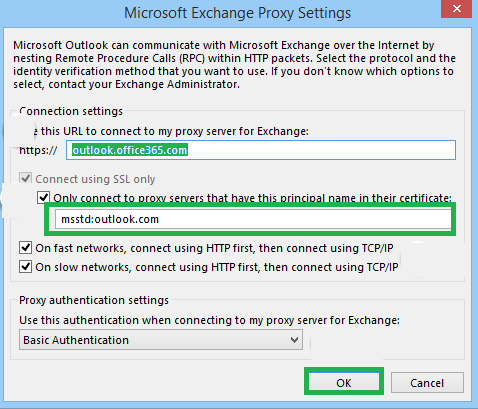
12. Click OK. In the Add Account window click next.
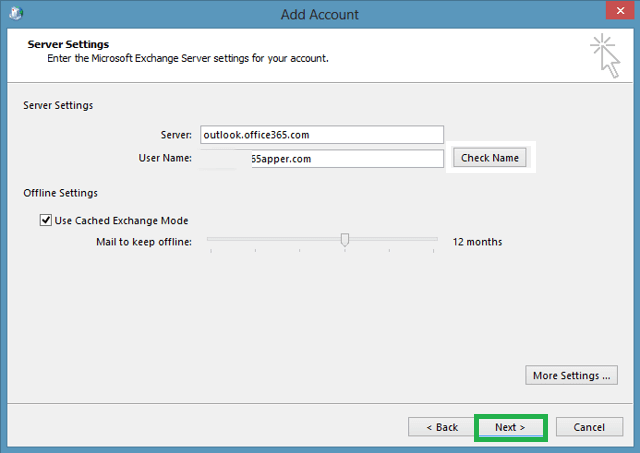
13. When the pop-up asks you to enter your Office 365 credentials, provide the username and password of the user. After that, click OK.
14. Finally, click on the Finish button.
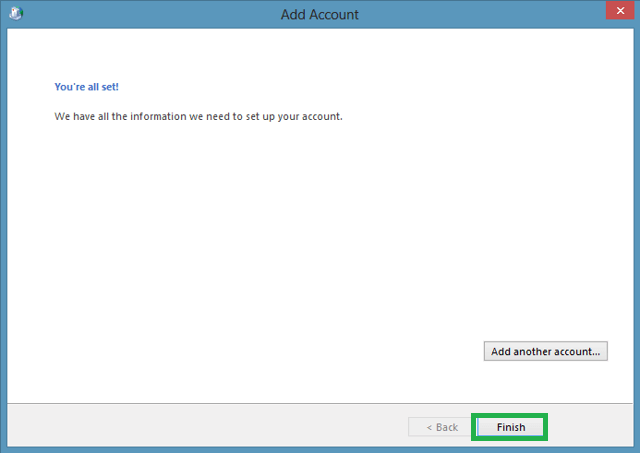
You can choose to create this profile as default by choosing the always use the profile or receive an invitation to make use of this profile in your Mail window.
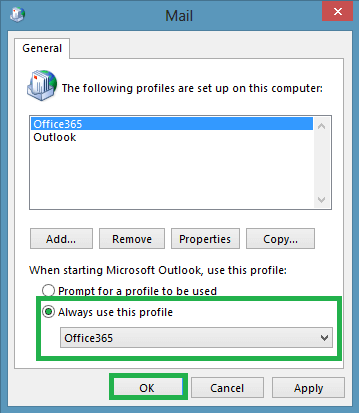
15. Therefore, this is why the Office 365 account is configured to work with the Outlook application. It will become in use after a certain period of period of.
Manually Configure Office 365 Account in Outlook 2016
Let’s look at the settings that is available in Office 365 in Outlook 2016 version. It is necessary to follow the same procedure from the 1st to sixth. Then , follow these steps:
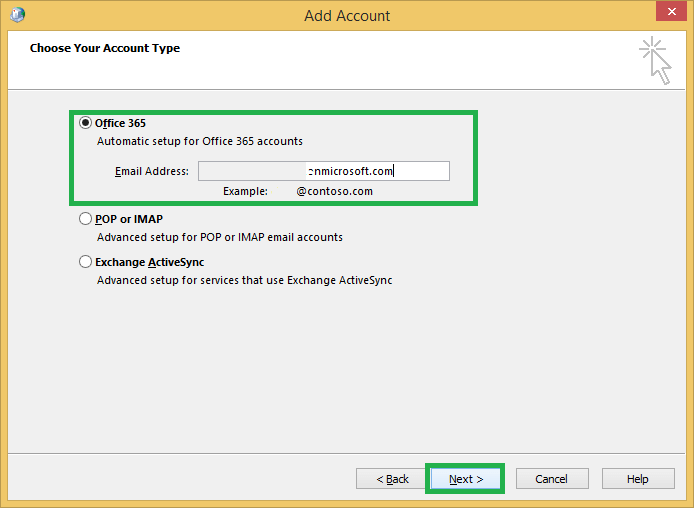
1. After selecting the manual setup or the Other Server Types option After that, the account add page should be open. Choose option Office 365 option, enter the email address for the account and click the next.
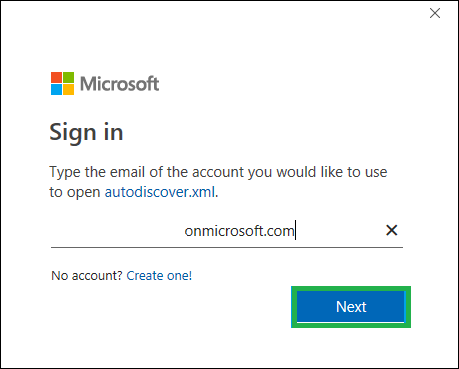
2. After a few minutes, the autodiscover.xml window will be opened. Input with the Office 365 credentials like user name, password, and click Next.
3. The next screen will be showing that the setting up of the Office 365 account in Outlook is successfully completed. Select Finish to finish the setup procedure.
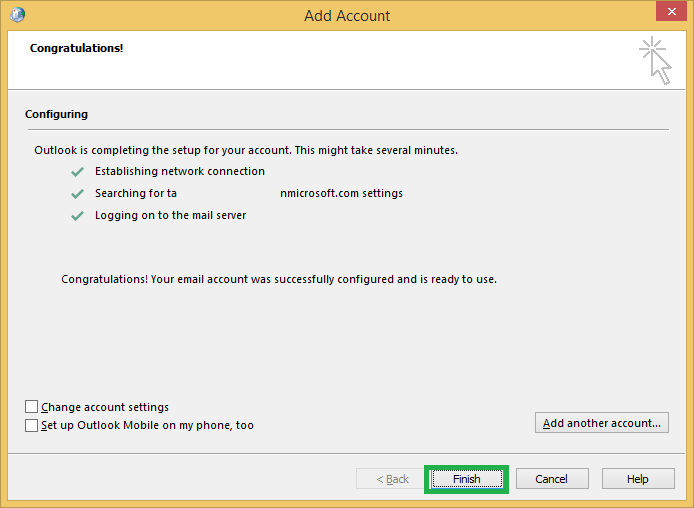
In both cases when the configuration is set up, you can open your Outlook application. You will be able to view the newly added Office 365 account mailboxes and send mail through them continuously. Apart from that the user can set up an Exchange Server account IMAP servers like Gmail, Yahoo, etc. Although it may take time to get the configuration set up, the procedure is simple and does not require much effort.
The setting in Office 365 within the Outlook application indicates that data is synchronized that means any changes made on the platform of choice will display results on the next platform. However, if you wish to transfer Office 365 mailboxes permanently to Outlook platform, then you should try the most well-known Office 365 to PST migration software. It swiftly moves only the required mailboxes’ data through various intelligent filters and executes the entire procedure in a few steps. Every version and plan for Outlook as well as Office 365 are supported by this powerful automated tool.
Final Words
It is possible to manually setting up accounts such as Office 365 to Microsoft Outlook with slight variations for various versions. Manual setup allows for the configuration of the account and then final access to emails in the account’s Outlook application.
