Last updated on June 9th, 2022 at 05:02 am
MS Outlook’s flexible features enhance the communication between the sender/receiver. You can customize the interface of your email message to display the information you want.
Outlook professional users who use it with a business account will want to optimize the performance of the email by changing the way the information is displayed to the recipients. Outlook allows you to choose which name to display.
Sometimes the receiver doesn’t see the full name of the sender. This is because the first name was not entered when setting up the Outlook account. It’s easy to modify the Outlook name settings.
Outlook 2019/2016/2013
Here’s how to change Outlook’s display name
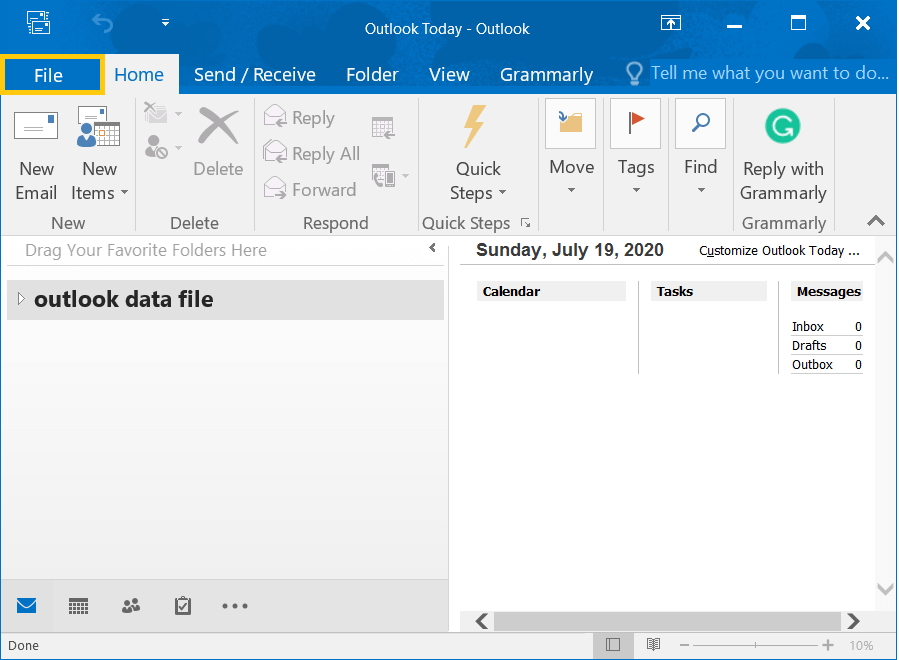
1. Open Outlook, and then go to File option on the menu bar.

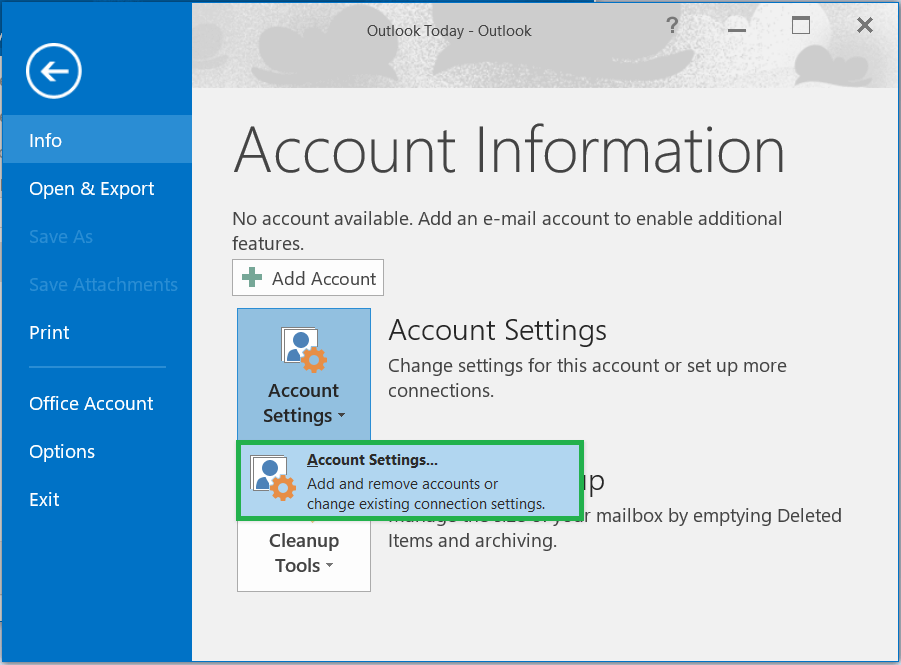
2. Go to Account Settings>> Account Settings.

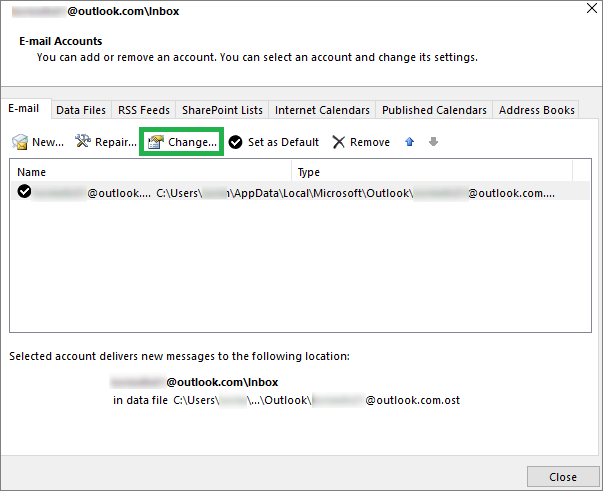
3. Select the email and click Edit Icon.

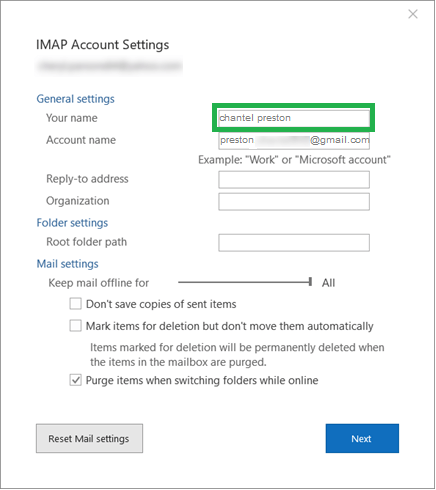
4. You can change the account name by going to YourName in the General Setting section. If you just want to change your name, you can leave all settings unchanged. If you only wish to change the name, you can click Next to close the setup and update the user name.

Outlook 2010
Outlook 2010 support is coming to an end soon. However, you can still use it by following these steps to modify the user name in your email display.
- Start Outlook and click Save.
- Navigate to Account Settings. Click again in the drop-down menu Account Settings.
- Go to the account you wish to modify.
- Change the name in the User Info field to something more appropriate to what you want to be included in the recipient’s mails.
Outlook offers many settings options that can improve the performance of email communications. Outlook also helps you in every way possible to increase the impact of your emails. This is one of many options to improve Outlook.
- Template: Save emails
You don’t have to use the same content every time you send an email. You can save the message to Outlook as a template so that you can use it as a template in future emails. Learn how to Outlook allows you to create an email template .)- Click Save.
- Choose Outlook Template from the drop-down menu to create a new template.Later, if you need the template for a new mail, you can select items then Choose Form and then click Templates.
- Schedule email for a future delivery
Outlook allows you to send an email later, even if you have already written it. You can also use the Do Not Deliver Before feature to specify the time you would like to send your email.
Click Options. Next, go to Delivery. Finally, choose Do Not Deliver Before. You will need to specify a time at which the email will be delivered. - Webmails as Conversations
You must have been using Facebook Messenger or WhatsApp to chat a lot. These features allow you to see both sides’ messages in one thread. Outlook also offers this feature, so you don’t have to scroll between emails. Click View in the tabs to check the option Show as conversations. - Block unsolicited emails
Unwanted emails from spammers or phishers are not something you want to receive in your inbox. You can treat junk emails as spam to keep your inbox clean. Click Home and then click Junk mail options. In the new wizard, enter the email IDs for the sender you wish to receive the message. - Allow notification for important messages
You may find it distracting to receive notifications about incoming messages. To limit the distraction, you can disable the notification for only a few contacts. Click on File, then Options. In the Mail Options, you can select the contacts whose email you wish to view. Outlook will ensure that you do not receive notifications from any other contacts.
Conclusion
Outlook is the best business email client. It has many features that increase the quality of the emails you send to clients. It is therefore essential to protect its data files. These files can be rendered inaccessible by a single corruption. It is possible to fix corrupt PST files using a high-quality PST Repair Tool. This tool can also be used to attach the PST file to an existing account.
