How to change IMAP to POP3 Account
If you are configuring your email account in the client like Microsoft Outlook, you have the option of getting service information through either the IMAP and POP3 port. It is possible to switch between 2 settings any point once the account is active. Outlook 2010, and Outlook 2013. Auto Account Setup will certainly attempt to set up your web account as one IMAP account. Outlook In 2007 , it was the first time that Outlook attempted to configure the account as an IMAP account. POP3 account.
Although it is not possible to change the existing IMAP account to an POP3 account, it is possible to accomplish this task using the steps below:
Step 1: Join your POP3 account..
Step 2: Transfer your mail folders.
Step 3: Unblock your account from your IMAP account.
Step 1: Connect your POP3 account.
Follow these easy steps, one at a time, listed below to make the account POP:
Outlook 2007
Go to Tools > account settings... Click The new...
Outlook 2010 and Outlook 2013, and Outlook 2016
File ⇒ section Info ⇒ Account Settings ⇒ Account Settings… ⇒ Add…
Outlook in conjunction with Office 365
The new wizard for configuration does not permit you to create the same account to multiple times. It is possible to do this with an Mail applet.
1. File > section Information is Account Settings. Manage Profiles
2. Close Outlook.
3. A dialog box will pop up. Select from the email accounts...
4. In the Email tab, click on the add... option.
You can make use of to use the "Auto Account Setting" wizard, however, it may require you to input your email address, name, and password. Outlook will search for the required settings to set up your account. If this method fails, or fails in obtaining IMAP configurations, then you may select the "Manually Configure Server Settings " or additional server Types" alternative.
While creating your POP3 account by hand, make sure you have server configuration information. If you don't have this information, ask the email service provider for the necessary configurations.
Step 2: Transfer your mail folders
Another way in that we can switch between IMAP to POP3 after you have added your account to one of the POP3 account, you'll be able to see that all emails within the IMAP account Inbox folder is downloaded. The subfolders you have as well as the folders you email to are not downloaded since POP3 permits downloading only Inbox messages.
Note It is not possible to move or copy folders onto Inbox or other items since they are separate folders. If you wish for these to be moved you must choose messages instead of folders.
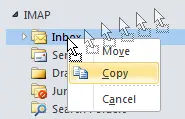
(Right click drag and drop menu)
The read / unread/ forward or reply status of messages stays the same even if you transfer contents to the new account. To do this, first clear the inbox folder in the POP3 account to ensure that there are no duplicates.
Transfer any information from the local non-mail directory such as calendars, contacts and so on simultaneously. It is recommended to put the Calendar and Contact folders on a table view, first and then transfer the selected items using the Drag & Drop option.
Step 3: Disconnect your IMAP account
This is the final step to do. After you've transferred all of the data into you POP3 mailbox, then you are able to completely delete your IMAP account using the account settings.
When you use Outlook 2013, be sure to first establish the POP3 account's PST file to be an default store prior to take down from the IMAP account. In order to do that, choose the Data option. POP3 mailbox that has PST set it as the default.

